Building Acoustic Treatment Wall Panels
 Jimmy from KRK here, and I wanted to share my experience of building my own sound panels for a home studio. I built wall panels, corner traps, and an overhead-cloud which will be shared on three separate articles—this article is strictly about building wall panels. KRK pioneered the home recording revolution and it is no secret that many recent hit songs have been either partially or completely recorded and mixed in a home or project studio. Whether you are in a basement, a bedroom, or a living room, acoustic treatment will go a long way for your final production results. Many overlook the importance of sound treatment after spending a lot of money on high-end recording gear. Quality recording gear such as a pair of KRK Monitors is certainly important, but it is also important to keep in mind that good gear magnifies the sonic environment for better or for worse. Sound treatment panels help shape these scenarios for more professional results.
Acoustic treatment wall panels are very important for a few reasons:
- They absorb the first sound reflections from the speakers so that the frequency waves are dampened and tamed.
- In general, they absorb the sound in the room to control echo and reverberation. For modern music creators this is essential because many people track vocals and instruments in the same room as the mix position.
 For truly professional results, it is essential to have a controlled environment for tracking, mixing and mastering. For those on a budget and space-constraints, it is difficult to create a perfect listening environment unless you are building a room from scratch (floating room, sound proofing inside the walls, etc.,) but it is possible to greatly improve your surroundings for successful professional results. A smart way to look at it is to figure out what it is you are trying to accomplish before you purchase or build anything. Some of the important questions to ask are:
- How much can I afford to put into the project?
- (I wanted to keep my costs as low as possible.)
- Is it important for the place to look professional?
- (I wanted to room to look as professional as possible.)
- Will a room with a “vibe” make you or whoever is using the room feel more creative?
- (I wanted a great vibe to the room.)
- What are the basic sonic elements and trouble-spots in the room?
- (I have an uneven 13.5-foot x 11-foot room with low ceilings which creates a lot of bass problems.)
- Will the room be used for mixing, recording, mastering, or for everything?
- (I will be using the room for mixing, recording (including vocals and acoustic instruments), and some mastering depending on the project.)
- What genre of music will the room be used for (i.e. Hip-hop with a lot of low end, Jazz, Rock, EDM, etc.)
- (I will be using this room for many genres of music.)
In this article, by taking all those questions into consideration, I came up with a game plan to build my own acoustic treatment for the room.
Before I go into any detail, I would like to mention that I am not a professional carpenter, and these are not direct instructions on “how to” build acoustic panels. In this article I show how I built my sound panels—and if you attempt to build your own you are responsible for how you use this information to build and install them on your own, and at your own risk. You are responsible for how you use this information. I am also not claiming in any way to be an expert on this matter. I simply did some research, talked to a lot of trusted friends, used my past studio experience, and then built the panels in my own way. Also, I used some basic power tools and hand tools that I will recommend, so if you are uncomfortable using tools please seek help from a professional – thanks!
(Click on any of the images below for a larger image.)
 For my room I measured the walls and decided that I would place eight (8) 4-foot x 2-foot x 4-inch panels strategically hanging around the perimeter. From research and talking to those who have built panels, I decided that these panels would not go flush against the wall but rather would sit 1.5-inches away from the wall. This creates an air gap that allows the panel to absorb sound from both sides which in turn creates greater sound absorption. Later in this article I will explain how I accomplished this feature.
After pricing out the insulation, I decided to go with a mix of Owens Corning 703 (I actually used Knauf which is the same specs just more organic) and Rockwool sheets both being 4-foot x 2-foot x 4-inch (I had to double up the Knauf as it came in 2-inch thick sheets.) From what I understand they are very similar in nature but the Knauf and OC703 are more expensive.
Here are estimated costs for building one panel:
- Roxul 4-inch thick Mineral Wool 4-foot x 2-foot sheet, Cost: $14.50
- (2) 8-foot x 3-inch x ¾-inch Furring strips (wood) from Home Depot, Cost: $2.75 (for the exterior frame)
- (2) 6-foot x 4-inch x ¾-inch Pine, Cost: $11.13 (for the box-frame)
- Fabric – CASTIELLE ACOUSTIC SUEDE FABRIC BY THE YARD, Cost: $6.50 (1 panel)
- Wrapping for back of panel- Home Depot paper-throw tarp, Cost: $1:75 (1 panel)
- Screws for assembling the box and frame, Cost: $.72
- Screws for mounting the panels to the wall, Cost: $.10
- 3/8 Staples, Cost: $.35
- Polyurethane/Stain, Cost: $.95
Tools Used:
- Sandpaper (I used a motorized sander which was easier)
- Electric Power Miter Saw (you can very easily achieve the same cuts with a hand saw)
- Pro grade staple gun (not electric)
- Staples (“T50 3/8th” 10mm Heavy Duty made by Arrow)
- All-in-one polyurethane/stain and a brush
- Stud-finder
- Philips head screwdriver (I used a power driver, but a regular screwdriver will work fine)
- Knee pads
- Protective rubber work gloves, eye protection, and a breathing mask
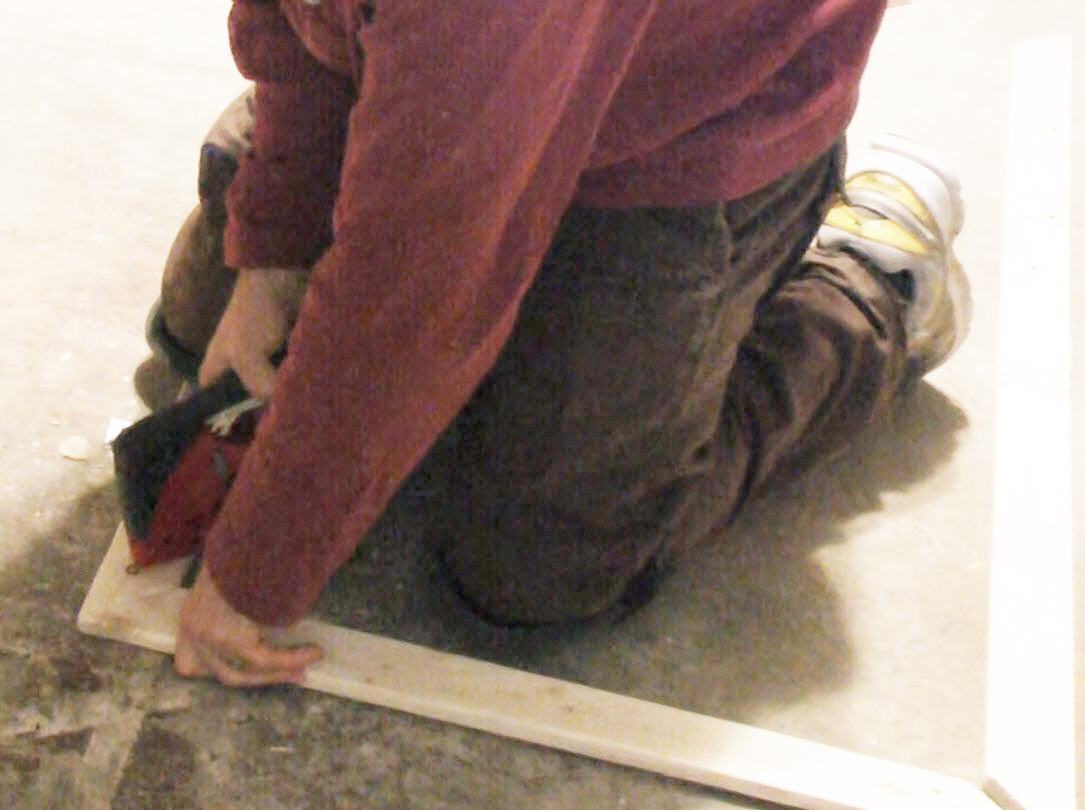
BUILD THE BOX-FRAME – MEASURE AND CUT THE WOOD: There are basically two components to the frame on these: The box-frame that houses the insulation, and the external frame that goes over the box to make it look nice. For the box-frame, I first took each 6-foot board and cut them down so that there were two (2) 4-foot pieces, and two (2) 2-foot pieces.
 SAND THE EDGES: Using a power sander (you can easily accomplish the same task with sandpaper) I sanded down all the edges of each piece and made sure there were no splintering ends popping up. So now I had 4 sanded pieces of wood to work with.
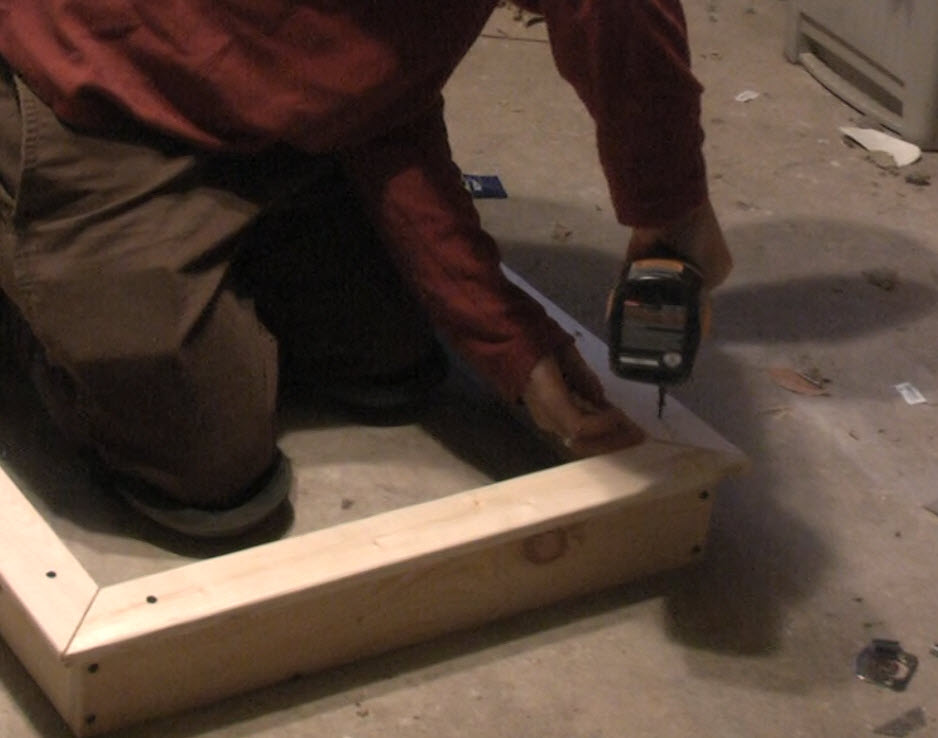
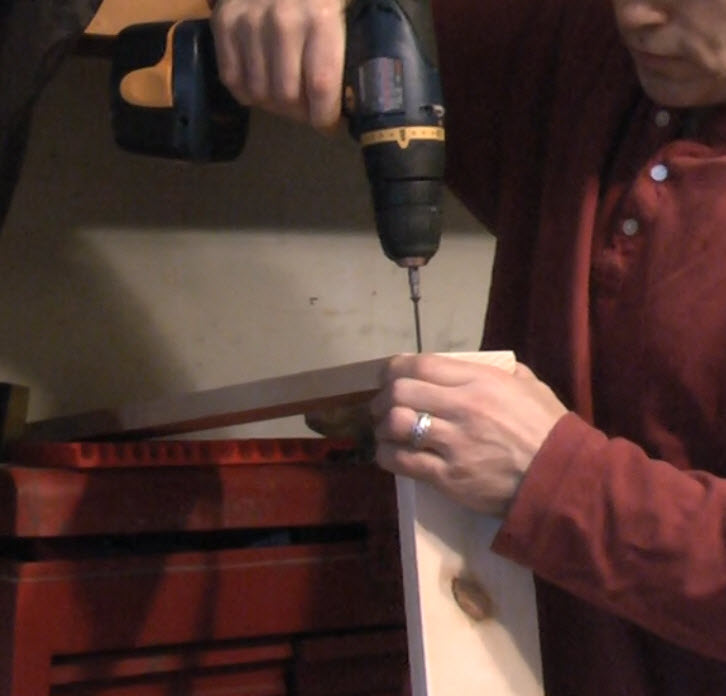 BUILD THE FRAME BY SCREWING TOGETHER THE PIECES: This can get a bit tricky if you are working alone. Joining the first 2 pieces of wood are the hardest. The ends of a long piece and a short piece are joined with the short piece on top. Using a table as a sawhorse to stabilize the pieces since I am working
 alone, I lined up the pieces and drove the first screw in so that it went through the top end of the short piece into the end edge of the long piece. I drove the screw in very slowly and carefully to minimize the chance of splitting the wood. The second screw was then driven into the other end of the corner.
 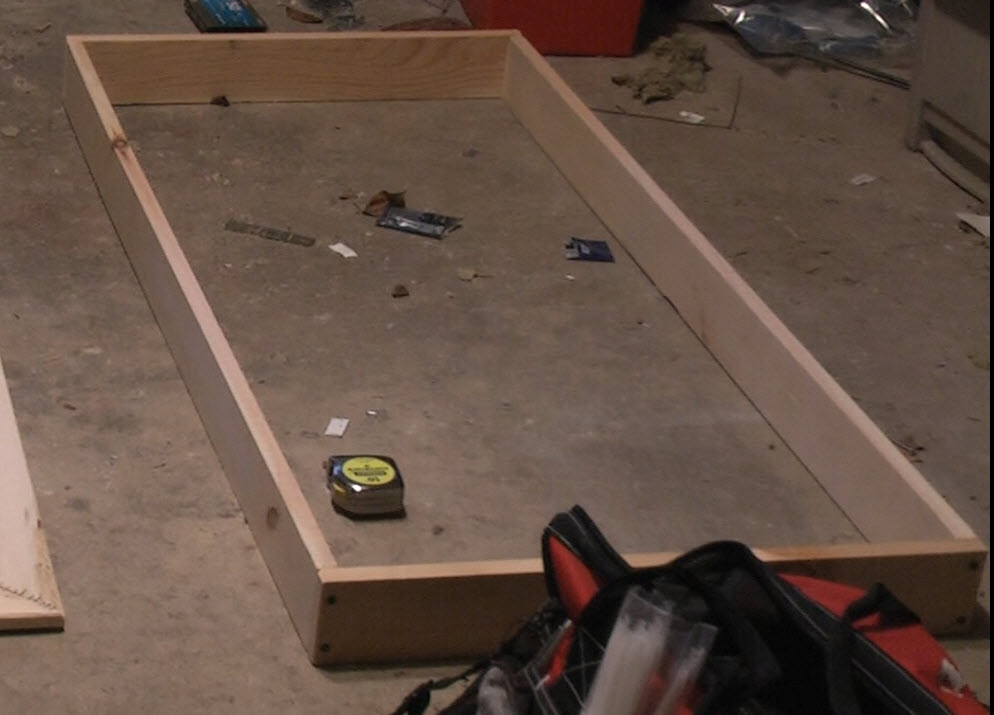 Once the two screws were in, I then worked my way around the perimeter of the frame until the box was built. The most important thing to remember here is to make sure the screws are put in straight, and to try to drive the screws down the middle of the long pieces.
BUILD THE EXTERIOR FRAME – MEASURE AND CUT THE WOOD (FURRING STRIPS): The exterior frame is what makes these panels look professional. To accomplish this,  first I exactly measured the inside perimeter of the box-frame so that I knew how to cut the exterior frame. The exterior frame goes over the box-frame, so it overlaps—meaning that the inside perimeter of the exterior frame is smaller than the inside perimeter of the box-frame. This helps to keep the insulation in place and makes it easier to staple in the fabric – it also covers up the box-frame. So, with my inside perimeter of the box-frame being 48-inches x 22.5-inches, I measured out the furring strips and made my 45 degree angle cuts so that the inside perimeter of the furring strips were 46.5-inches x 21-inches. This created an overlapping boarder over the box-frame to keep in the insulation and fabric.
SAND THE EDGES: I then sanded the edges of the furring strips with a power sander so that there were no rough edges to be found.
 ASSEMBLE THE EXTERIOR FRAME: I inspected the wood and identified the best sides. These furring strips are so cheap that you must check out each piece to make sure they are visually suitable, and usually one side is better than the other. Next, I laid out all 4 pieces on the ground upside down so that the staples that join the pieces are not on the visible side. Starting in one corner, I then began to staple the pieces together until the frame was one rectangular piece.
 ATTACH THE EXTERIOR FRAME TO THE BOX-FRAME: The biggest thing to remember here is that the exterior frame is not very stable until it is screwed into the box-frame. So, knowing this I carefully lifted the exterior frame in one motion, flipped it over and placed it on top of the box frame. Starting at one of the 2-foot ends, I visually lined up the frame so that it was evenly placed on the box-frame. This is not too important because you can manipulate how it sits as you start to screw it down. I then took a screw (the same screws as the other step) and in one corner, carefully screwed through the top of the exterior frame into the edge of the box-frame.
 This can be tricky as you must make sure you are aligning the screw correctly so that it hits the middle of the box-frame edge. The best way to do this is to move to the opposite corner and then align and drive another screw. Continue onto the other end and manipulate the exterior frame so that it lines up straight. Once you have 4 screws in the corners and the exterior frame is straight and aligned properly over the box-frame, continue to drive 4 more screws into the opposite edges and then more screws in the middle of the frame for stability.
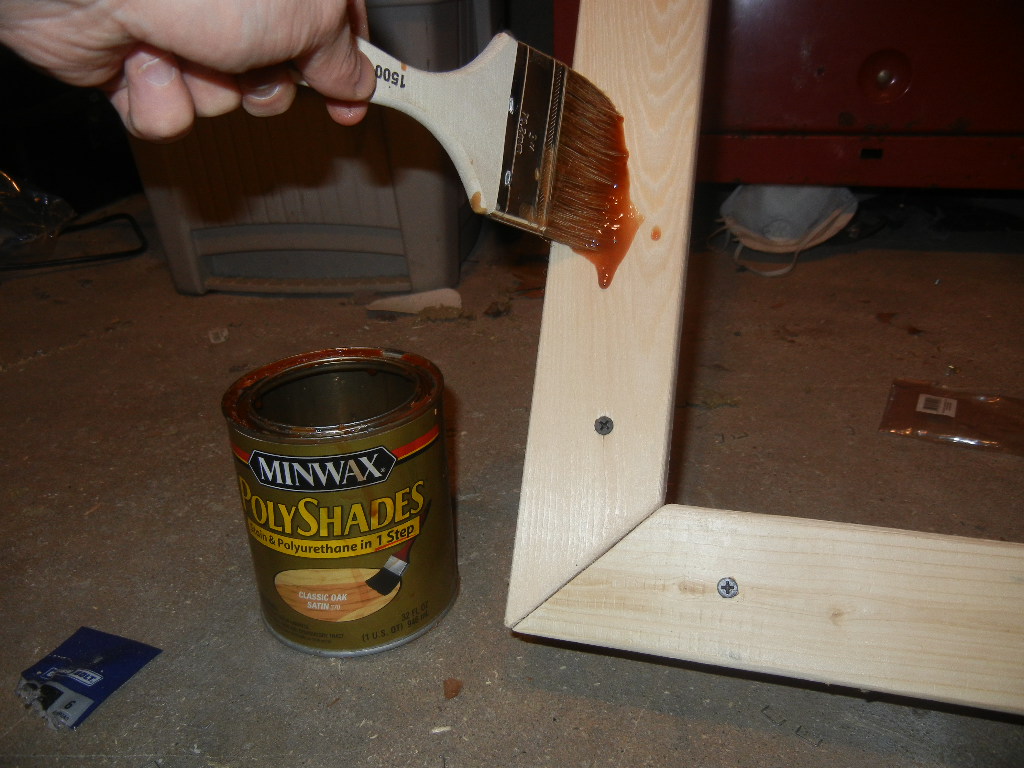 STAIN AND POLYURETHANE THE FRAME: After the frame was assembled, I used an all-in-one polyurethane/stain to finish the panel. You can also paint the frame, but either way make sure that you allow it to dry so that you do not ruin the fabric when you go to the next step.
 STAPLE IN THE FABRIC: After the frame dried, I turned it upside down and stapled in the fabric. It is important to note that the fabric is being stapled to the underneath-overlay of the exterior frame. The best way to do this is to start in one corner and work your way down the long side laying in staples about every 5 inches or so. The corners are the most
  important thing to consider. Next lay in staples on a short side and continue along the other long side. You need to get a feel for it, but you want to gently pull the fabric as tight as possible without ripping it out from the other side. You want to pull the fabric toward you and away from each last staple you laid in. Leaving one short side un-stapled, I then went back between the 5-inch staples on each long side and laid in more staples pulling the fabric tighter. Finally, I went to the last short side and laid in staples to pull the fabric as tight as possible. It is helpful at this point to double check the corners to make sure they are covered and tight.
LAY IN THE INSULATION: Wearing protective gloves, 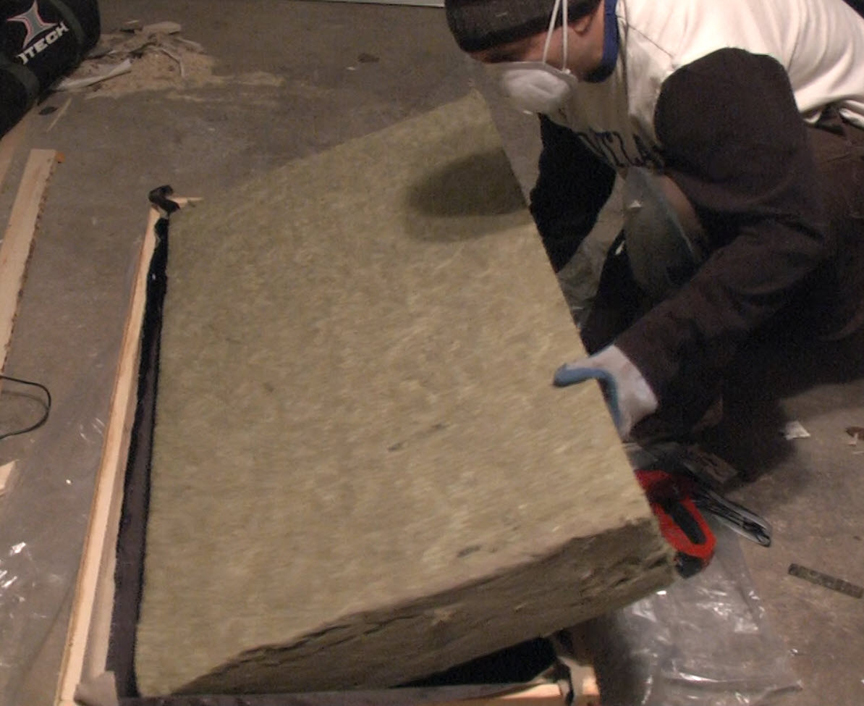 a long sleeve shirt and a low-grade breathing mask, I handled the insulation carefully and laid it into the upside-down frame. I then stapled the insulation to the box-frame around the perimeter, but did not go overboard on this step.
 WRAP AND STAPLE THE BACK OF THE PANEL WITH PAPER/POLY DROP CLOTH OR WRAP COMPLETELY IN FABRIC: As I stated before, I was going for a “cost-effective” approach here with my whole room. One of the ways I saved money was by covering the back of the panels with the above noted cloth, opposed to wrapping each panel completely in the acoustic
 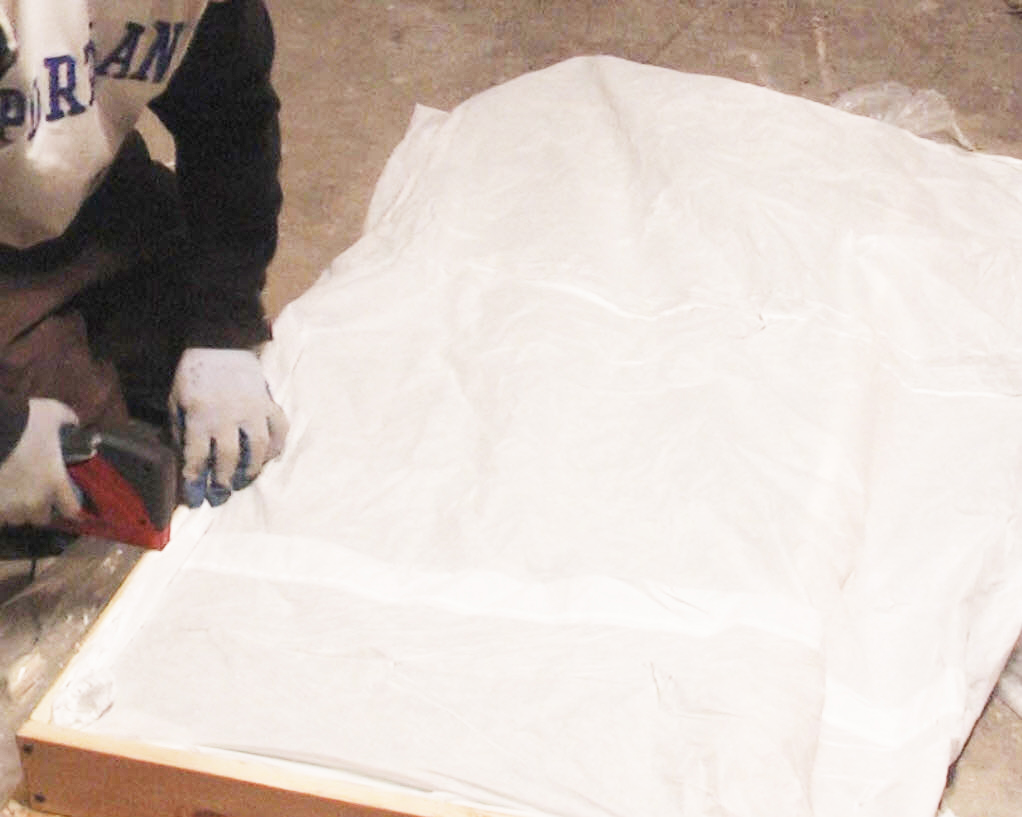 fabric. I think wrapping the insulation completely in fabric is much easier and probably a much better all-around solution, but in my case, I was trying to save some money. I achieved this by just sealing the back off with the cloth and staples. I went around the perimeter of the frame over the insulation, and then I folded the cloth back over so that it was double wrapped.
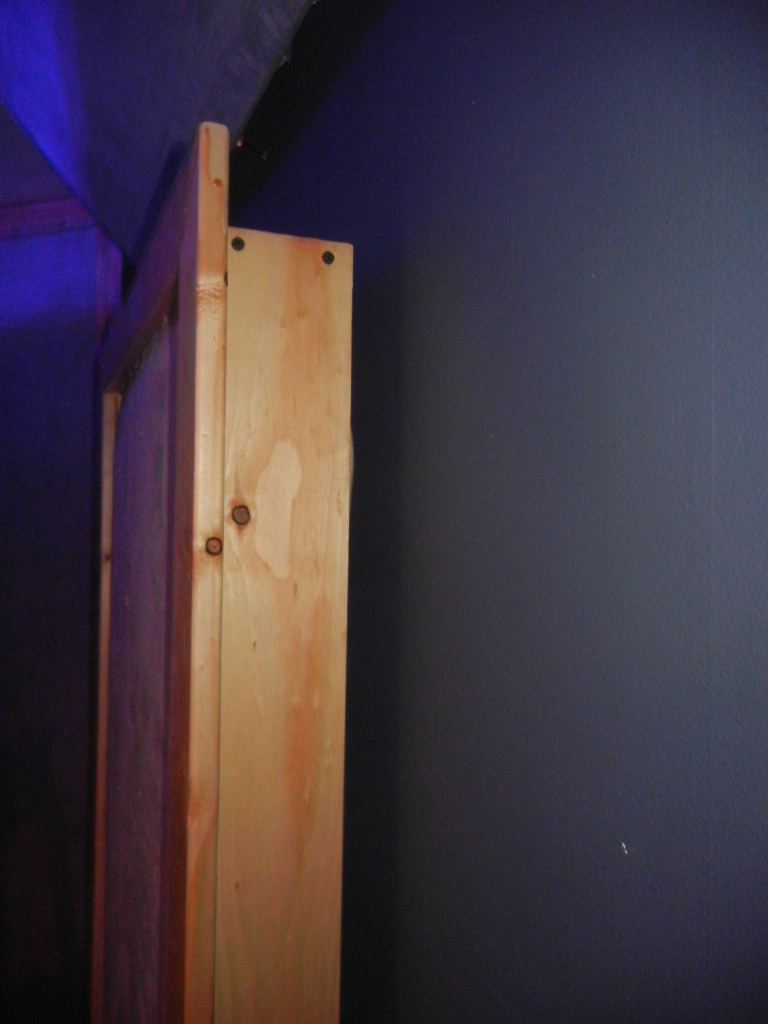
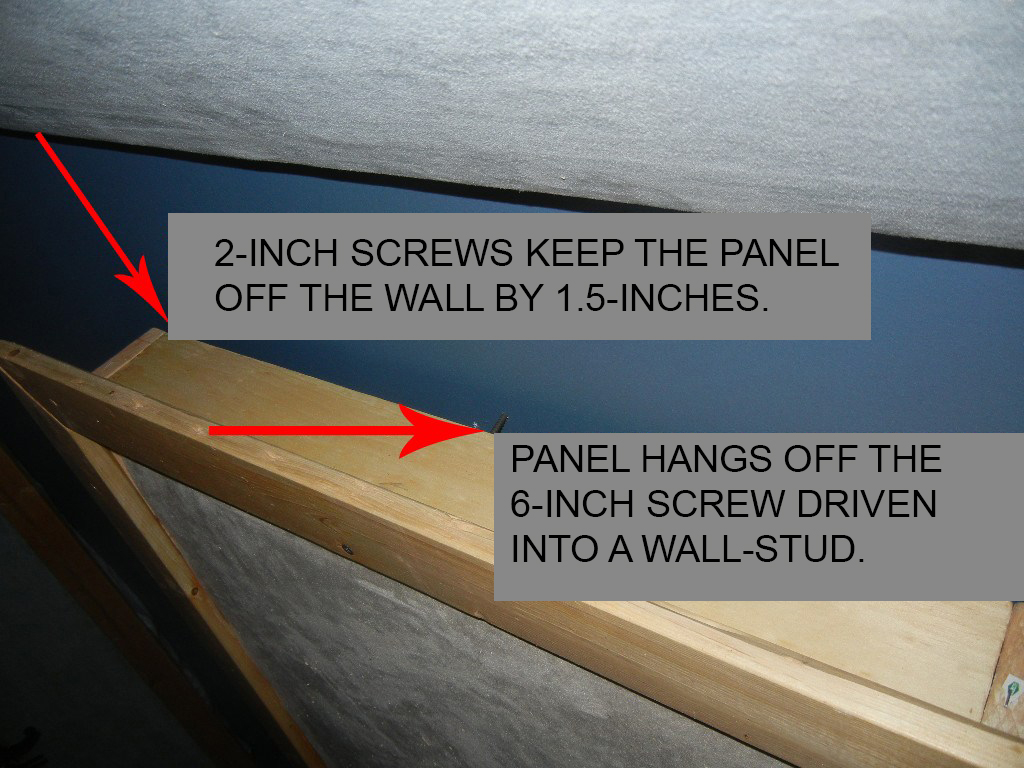
INSTALLING THE PANELS TO THE WALLS: After many considerations, I came up with a unique and inexpensive way to get these panels up on the walls using 4 short screws and 1 long screw—this created that air-gap which creates even better sound absorption. Since the wood I used was so inexpensive, it was also very light which helped with the installation.
 Using the same screws to assemble the frames, I drove in a screw in the back of each corner so that there was 1.5-inches from the head of the screw to the frame. Once hung, this created the “air-gap” between the panel and the wall that I was talking about earlier in this article.
Next, I found the first points of reflection on each wall and determined where to place the first two (left-wall and right-wall) panels (search: “acoustic panel mirror trick” for help with placement). Once I determined this, I then used a stud-finder to see if I could utilize a wall-stud to drive the holding screw in. On one wall I got lucky and on another I was forced to use a heavy-duty wall anchor.
 On the wall, I made a mark roughly where the speaker cone hits and then I made two more marks roughly where the top and bottom of the panel would be centered vertically considering the cone height. Referencing by eye, I then drove a long 6-inch screw into the wall so that roughly 3-inches were exposed. I then simply hung the panel on that screw and the 1.5-inch screws rest against the wall to create the gap. In my case, nothing brushes up against these panels, but you may want to come up with a more secure installation method if there will be a lot of activity around the panels.
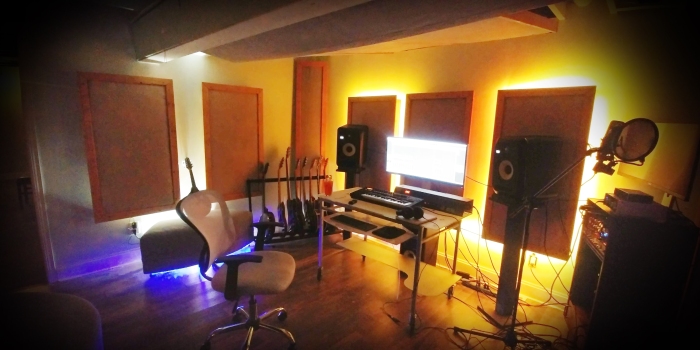
 The result is 8 professional-looking custom panels floating off the walls. The difference in the sound control of the room is astonishing and the look is very professional. The clarity and control I now have from my productions are accurate and inspirational, especially knowing that what I am hearing will translate correctly though other listening environments and devices.
Next month I will focus on Part 2–corner trap panels. Thanks for taking the time to read this and please post questions and comments below.

 Getting back into the studio, I sat down to listen to what they’d recorded and as soon as my bro Aaron pressed play, my phone began to vibrate. I excused myself once more to take the call and it was my friend Ranae, her tone was excited but serious. She got straight to the point, “Hey Dennis, so this is urgent! I have a friend who is a producer at American Idol and he’s looking for talent. He asked me if I knew anyone and I immediately thought of you! This is no joke—super serious!” Before I could spit out my response, she said, “If you’re down, please send me a video of you singing and playing guitar, ASAP!” Of course, I said, “Well hell yeah I’m down—I’ll send it right over!” To that she responded, “I’m so excited for you! I’ll forward it to him when I get it, and he’ll call you today or tomorrow, so glue your phone to your hand or something!” He called me that same day and well, the rest is history…
 Later that week I found myself standing in line with thousands of other musicians, each of us about to take on the opportunity of a lifetime. I stood in front of Lionel Richie, Katy Perry and Luke Bryan. I grew up listening to a lot of rock and artists like Lionel, and not many people knew how big of a KP fan I was. Sometime after I had first moved to LA, I went to Runyon Canyon. Me and my bro Will overheard a tour guide from the bus yelling “And THIS is Katy Perry’s house!” That was a big deal because again, I loved Katy Perry. I said to myself “One day, I’m gonna meet her out here.” What were the odds that the American Idol show would be revived, I’d get a call to audition, and that KP would be one of the judges? – good enough apparently!
 So there I stood, in front of three juggernauts of their respective genres. Teamed up with my broken guitar with a hole in it, I sang “
 A lot of people ask what my overall take away from the experience was or what did I learn, and here is what I normally say. Firstly, if you think your career is set for life after becoming Top-10 on a show like American Idol, think again! That’s when the real work begins:
 There’s also one final thing I want to share with you! If you’re an artist and you’re reading this because you’re a fan of mine, or because you just want to read what some guy who almost won American Idol has to say, get a home studio setup! To those who already have one, and I know there are many, you’d be surprised how many artists don’t take that leap. So, here’s what you’ll actually need:
 Here’s a list of what I use: MacBook Pro, Logic and Ableton Live, Apogee Hype Mic, a pair of KRK Rokit 7 G4s (these are really great speakers for a home studio!), Yamaha Portable Grand, Stage Stands mic stand, Audeze LCD-1 headphones, KRK KNS800 Headphones (for mix reference), Apogee Duet, and some random studio chair I found a few blocks from my house.
 One final, final thing to note: I know how this business can be, so getting help as you navigate through is a must. With that, I hope this article was of some help to you, until next time, rock on!
 If you’re a fan of musical gear you’ve surely heard of the NAMM show in Anaheim California. If you’ve never been, it’s an overwhelming bliss of musical stimuli that opens your eyes wider at every juncture. As a musician, it’s where you go to see the newest—greatest—latest—bestest-of-the-best gear that will soon hit the market in the upcoming year, but it’s also where you go to meet like-minded musicians who all share the same passion of music creation and performance.
 Guitar Solo Contest at NAMM in conjunction with Gibson and Epiphone. Each day, 12 fearless battle-axing warriors had 15 minutes to get acclimated to a short piece of music before recording one live take of their solo performance through ROKIT G4 10-3 monitors in front of NAMM-goers. Word of the contest spread quickly as each daily winner took home a new pair of ROKIT G4 RP5 White Noise monitors and a set of KNS8400 Headphones. Each daily winner then went on to a final post-Namm round where a panel of judges from Loudwire ranked each solo anonymously based on four criteria to determine a grand prize winner who was awarded an Epiphone Uptown Kat ES guitar.


 Each day, after the final 12 daily performances, the recordings will be judged on specific criteria (Creativity, Originality, Accuracy, and Technique) by a panel of Gibson employees and endorsed artists. One winner per day will receive a pair of KRK ROKIT G4 studio monitors, KRK KNS Headphones and other Gibson and Epiphone swag. Winners will be announced daily at 4:30 p.m. at the KRK booth and on social media. They will also be contacted by a Gibson representative who will coordinate the shipping of the daily prize. The winners do not have to be present to collect the prizes.
 With KRK, you’re not going to find a group of people more supportive or fired-up about DIY music creation. On a daily basis, we thankfully hear from and talk to incredibly talented musicians, producers, mixing engineers and songwriters about their experiences with our gear. Recently, we caught up with a KRK user who we truly respect in that DIY spirit; someone who will forever be ingrained in Rock & Roll history with one of the most engaging music videos ever.


 At KRK, we worked hard on making sure the new ROKIT G4 studio monitors were the absolute best they could be. We took a lot of knowledge from what we learned making the higher-end V Series 4 monitors, to reinvent a new product that delivers incredibly accurate sound reproduction for all music genres and applications.
 We wanted to build something game-changing for the new ROKIT G4 line that enables you to achieve better final mixes overall. In terms of critical listening, the G4 monitors are completely different, and a major upgrade from the previous G3 line, so our intentions with the EQ Recommendation tool were to suggest a flatter condition and help get you to a better starting point. Ultimately, it still comes down to preference and using your musical ear, but it’s certainly great to have this feature available along with the others in the app.
 Five of the app tools work with any monitor setup. This includes the Level Meter, which assists with monitor level calibration to ensure all monitors are at the same dB level, as well as the Delay Analysis feature that helps calculate the time from each monitor to the user’s ears. Additionally, the app’s Polarity function is used to verify the correct wiring of monitors, minimizing bass loss and incorrect stereo imaging reproduction—the results of monitors being out of phase, while the Spectrum RTA and Sound Generator are great for finding nuances in any environment. Also included is an unprecedented Monitor Alignment feature, which is used to determine the best placement of multiple monitors within proximity. Finally, the EQ Recommendation tool, specific to ROKIT G4 helps acclimate monitors to an environment by analyzing the app-generated pink noise and subsequently suggesting the best EQ preset, which is set manually on the back of the G4 monitors.
 The Spectrum RTA Tool is used to measure and display the frequency spectrum of the input audio signal in real time. It uses the Fast Fourier Transform algorithm to generate its frequency analysis view of amplitude vs frequency. This analysis can be used to detect various factors that affect the listening experience in your environment. It includes a signal generator that can generate sine waves, white noise, and pink noise. There is also a peak hold function. If you tap onto the screen, a cursor display will appear showing you the actual frequency and amplitude values. To disable the cursor just drag it outside the screen.


 We hope these audio tools are helpful for achieving better results with your audio productions and look forward to hearing what you create!